Yesterday and today I have been testing the procedures for connecting over wired and wireless networks to live video streaming and static image transfer. Below are details of my journey starting with live video streaming over a wired network without 3G and then over 3G.
Wired Network (no 3G)
The equipment being used is a Billion wireless-N/3G ADSL Router, two Eee PC netbooks, a MacBook Pro and a an EDIMax IC-3010WG dual mode camera.
Setup is straightforward:
- Connect the two Eee PCs via UTP to the Billion
- Connect the battery power pack to DC on the connector block, power on the power pack and ensure it is running at 12V
- Connect the EDIMax via UTP to POE on the connecter block
- Connect the connector block to the Billion via UTP from the connector block’s LAN socket
- Turn on the Billion
- Turn on the Eee PCs
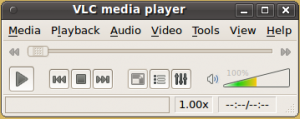
To connect to the live video stream follow the menu path: Applications->Sound & Vision->VLC Media Player to start the VLC player.
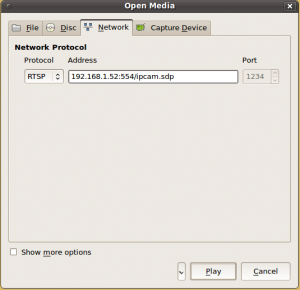
Follow the menu path Media->Open network Stream to display the Open Media dialog. Select the protocol RTSP and enter the IP address of the EDIMax. then click the Play button.
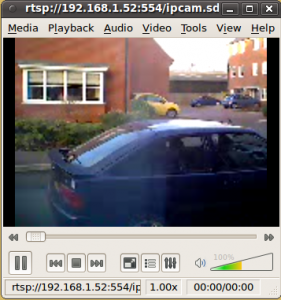
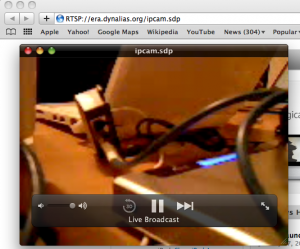
The live video stream should be display in its own window.
If no streaming is being received various checks should be made from confirming correct cable connects to running the application Angry IP Scanner to determine what devices are visible on the network to checking the power lights are on the EDIMax (it is possible for example the power pack is depleted!).
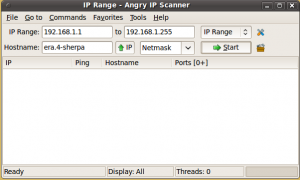
To check if the EDIMax is visible on the network start Angry IP Scanner by following the menu path: Applications->Internet->Angry IP Scanner.
Set the IP range to run from 192.168.1.1 to 192.168.1.255 then click the Start button.
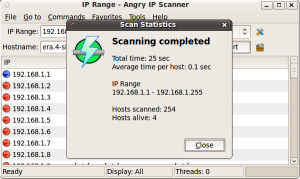
When scanning is complete the statistics will display how many devices are connected to the network.
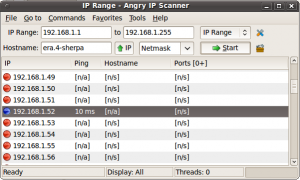
Scroll through the IP list and confirm that the EDIMax IP address is visible.
Wifi Over 3G
Assuming the steps have been followed in Wired Network above and is still setup make the following changes to switch to Wifi over 3G.
- Remove the UTP cables from the Eee PCs
- Remove the UTP cable from the LAN socket on the power pack
(optional – keeps things tidy) remove all UTP cables from the Billion - Connect the 3G dongle to the Billion (can take up to 2 minutes to establish connection to 3G network)
- Connect both Eee PCs to the wireless network
The same steps should be carried out now to connect to the live video stream via the VLC player as described in wired networks above.
Now that 3G connectivity is present remote computers can connect to the live stream via a browser at the following URL:
rtsp://[YOUR_WEB_ADDRESS]/ipcam.sdp
Due to the limitation of the 3G transfer rate the live stream will most certainly be decreased in quality. In such cases it is wise to amend how the EDIMax is transmitting its data.
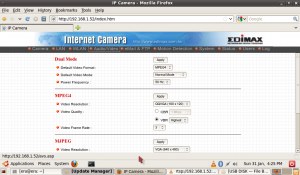
Connect to the EDIMax via a browser using its IP address as the URL. It will be trial and error in getting an improvement in display for the remote connection.
A test should be carried out by each user at each end of the connection to compare quality of display. Each user should make a video recording of what they are seeing.
It is also possible to connect an iPhone to the EDIMax via the iPhone app eCam. Once the app is installed on the iPhone create a new connection to the EDIMax.
Name can be whatever you like, IP address is the IP address of the EDIMax, and Password is the assigned password for the EDIMax. Leave Port at 80 and FPS at 5.
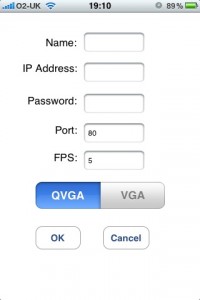
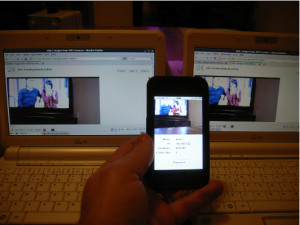
Select QVGA the tap the OK button. The image below demonstrates the EDIMax live video stream feeding to two Eee PCs and an iPhone.
Static Image Transfer
Assuming that the setup of the network has taken place for previous test detailed above it is easy to take a picture using the Ricoh Caplio 500SE and transfer it to the Eee PC running as a server.
In the simplest terms just take a picture then when prompted to send press the OK button on the camera. A light will flash next to the view finder whilst the transfer takes place. DO NOT interrupt the camera while the light is flashing or refresh the server browser as this can affect the transfer.
In the case of a failed transfer there are a number of checks that should be carried out to ensure the correct connection between the camera and the server.
Checked that only one network is active on the Eee PC, i.e if the network is wired turn of wireless and vice versa.
Check the camera setting as follows:
- On the camera start the menu by pressing the menu button
- Move right 2 tabs by pressing the right navigation button to display the EXP SET tab page
- Press the up or down navigation button to get to the option SEND TO
- Press the right navigation button to enter the SEND TO settings page
- With W/LESS LAN (FTP) selected press the right navigation button to enter the LAN/FTP settings page
- With NETWORK selected press the right navigation button to enter the NETWORK settings page
- Ensure the IP address displayed matches that of the camera (see label on camera). If it does not press the right navigation button to enter the IP address setup page and enter the correct address.
Note: use the ADJ/memo button to confirm entered numbers - Press the disp button to return to the NETWORK page ensure the primary DNS and secondary DNS are all zeros and the subnet mask is 255.255.255.0. The gateway should match the IP address of the Billion Router.
- Press the disp button to return to the LAN/FTP page.
- Press the down navigation button to select W/LESS LAN then press the right navigation button to enter the W/LESS LAN setting page.
- The setting here should have no reason to have been changed, but the CONNECTION CONFIG should be INFRASTRUCTURE, CHANNEL = 6, ESS_ID = ERA. The other two setting can be left alone.
- Press the disp button to return to the LAN/FTP page.
- Press the down navigation button to select FTP SERVER then press the right navigation button to enter the FTP SERVER settings page.
- Ensure the SERVER NAME matches the IP address of the Eee PC acting as a server. If it does not match this follow the same steps outlined above for changing the camera’s IP address.
- Folder should be /era/images
- Press disp until all menus have been exited and try to transmit a picture again, it should work now!
Angry IP scanner can be obtained from https://www.angryip.org/ … it’s available for Win/Lin/OSX and requires Java. Some anti-virus software flags AngryIP scanner as malware: Angry IP isn’t a virus, it’s just… misunderstood 😉
Of course you can use whatever IP scanner software you like to locate hosts on the network, but this is the one we used.